俗话说的好,一款产品的成功与否,细节是关键。比如:普通的一句话、一个输入框text、一段文字,有时候可能不会吸引你的注意,如果配上一些交互动画效果呢,是不是会让你有多看一眼or点击的欲望呢,这才是我们的目的。所以我们今天要分享的主题:文本Text的一些交互体验。
最近在项目中做了一些TEXT的交互,拿出三个代表的案例,在这里分享出来供大家学习,也算是notebook。OK,一起看下吧!
产品引导页
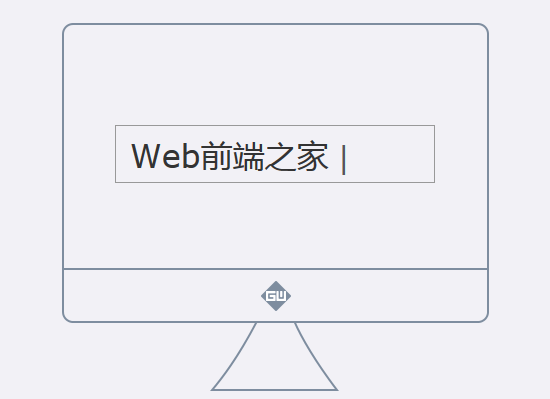
产品在维护期间,需要一个提示,引导用户进入首页或者其他页面,类似这样的页面,排版都很简单,如下图:

说明:这个是提示用户打开xxx页面的提示,我们采用的是打字输入的效果。我们看下具体的代码:
<!doctype html> <head> <meta charset="utf-8"> <meta http-eqUIv="X-UA-Compatible" content="ie=Edge,Chrome=1"> <title>移动支付正在维护中 - Web前端之家</title> <meta name="keywords" content="" /> <meta name="description" content="" /> <meta name="vIEwport" content="width=device-width, initial-scale=1.0, maximum-scale=1.0, user-scalable=0" /> <link href="/demo/dazi/d1/CSS/lp228.css" rel="StyleSheet" type="text/css"> </head> <body> <script type="text/javascript"> function recalc() { var x = 750,clientWidth = document.body.clientWidth; if (!clientWidth) return; document.documentElement.style.fontsize = 100 * (clientWidth / x) + 'px'; }; if (window.addEventListener) { recalc(); var resizeEvt = 'orientationchange' in window ? 'orientationchange' : 'resize'; window.addeventlistener(resizeEvt, recalc, false); } </script> <div class="cen-loading-box"> <p class="cen-p-fon">移动支付正在维护中,带来不便,敬请谅解</p> <p class="cen-p-fon2">请您用<strong>电脑登录客户中心</strong>进行存款</p> <div class="cen-comp-box scene"> <div class="inp-fon" id="vader"></div> </div> <PRe id="nodebug" style="display:none"><Code> theater.write( <span id="log"></span> ); </code></pre> </div> <script src="/demo/JS/jq.js"></script> <script src="/demo/dazi/d1/js/theater.min.js"></script> <script type="text/JavaScript"> (function () { "use strict"; var $log = document.querySelector("#log"); var theater = new TheaterJS(); theater .describe("Vader", .8, "#vader"); theater .on("*", function (eventName, originalEvent, sceneName, arg) { var args = Array.prototype.splice.apply(arguments, [3]), log = '{\n name: "' + sceneName + '"'; if (args.length > 0) log += ",\n args: " + JSON.stringify(args).split(",").join(", "); log += "\n }"; $log.innerHTML = log; }) .on("say:start, erase:start", function (eventName) { var self = this, current = self.current.voice; self.utils.addClass(current, "saying"); }) .on("say:end, erase:end", function (eventName) { var self = this, current = self.current.voice; self.utils.removeClass(current, "saying"); }); theater .write("Vader:WEB前端之家", 2000) .write(function () { theater.play(true); }); })(); </script> </body> </HTML>
大家可以预览效果。这里我用到一款插件:TheaterJS,它是一款逼真模拟打字特效的js打字机效果插件。后面会专门写一片文章:基于jQuery的text文字显示特效应用。
领红包提示
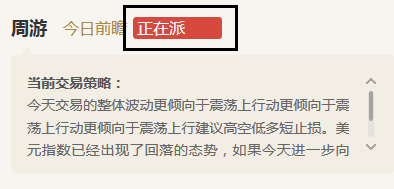
先来看下图:

这里的需求文字是“正在派红包”,其实完全可以用一个红背景白字来直接显示,这里添加了一个动画,更容易让用户有点击进入的冲动。这里我做了个简单的demo,代码如下:
<!DOCTYPE html>
<html>
<head>
    <meta charset="UTF-8">
    <title>正在派红包 - web前端之家</title>
</head>
<body>

<div id="Hotnews" style="background:#f00;width:80px;height:40px;line-height:40px;color:#fff;text-align:left;padding:0 15px"><!-- 正在派红包 --></div>
<script type="text/Javascript" src="/demo/js/JQ.js"></script>
<script type="text/javascript">
    $(function(){
        shownew();
    })
    var Newstime = 1500,
        TextTime = 120,
        newsi = 0,
        txti = 0,
        txttimer,
        newstimer,
        newstitle = new array();
        newstitle[0] = "正在派红包";
    function shownew(){
        hwnewstr=newstitle[newsi];
        if(txti>=hwnewstr.length){
          clearinterval(txttimer);
          clearinterval(newstimer);
          newsi++;
          if(newsi>=newstitle.length){
            newsi = 0;
          }
          newstimer = SetInterval("shownew()",NewsTime);
          txti = 0;
          return;
        }
        clearInterval(txttimer);
        document.getElementById("Hotnews").innerHTML = hwnewstr.substring(0,txti+1);   //截取字符,从第一个字符到txti+1个字符
        txti++;
        txttimer = setInterval("shownew()",TextTime);
    }
</script>
</body>
</html>
说明:这种文字呈现方式,我换了另外一种JS写法,没有用到专门的插件,因为它的表现形式比较简单,如果您有一定的JS基础都能看懂的,如果有疑问可以加入我们前端群:295431592。
表单text输入
表单输入效果,先来看张图:

日常我们都习惯应用普通的表单效果,大不了加点focus和blur的文字和边框颜色变化效果。其实完全可以再深入点,来些动画,给用户带来更好的体验效果,还是先来段代码:
<!DOCTYPE html>
<html>
<head>
    <meta charset="UTF-8">
    <meta HTTP-equiv="X-UA-Compatible" content="IE=edge,chrome=1">
    <meta name="viewport" content="width=device-width, initial-scale=1.0">
    <title>input表单输入文字动画 - Web前端之家</title>
    <link rel="stylesheet" type="text/css" href="/demo/dazi/d2/css/Normalize.css" />
    <link rel="stylesheet" type="text/css" href="/demo/dazi/d2/css/demo.css">
    <link rel="stylesheet" href="/demo/dazi/d2/css/styles.css">
    <link rel="stylesheet" href="/demo/dazi/d2/css/fancyInput.css">
</head>
<body>

    <div id='wrap'>
        <header>
            <div></div>
            <menu>
                <button>Effect 1</button>
                <button>Effect 2</button>
                <button>Effect 3</button>
                <button>Effect 4</button>
                <button>Effect 5</button>
            </menu>
            <menu>
                <label><input type='radio' value='input' name='type' /><span>input</span></label>
                <label><input type='radio' value='Textarea' name='type' /><span>textarea</span></label>
                <div></div>
            </menu>
        </header>

        <div id='content'>
            <section>
                <div>
                    <input type='text' placeholder='type something...' value='输入文字' />
                </div>
            </section>
            <section>
                <div>
                    <textarea cols='1'></textarea>
                </div>
            </section>
        </div>
    </div>

    <script src="/demo/dazi/d2/js/jq.js" type="text/javascript"></script>
    <script src='/demo/dazi/d2/js/fancyInput.js'></script>
    <script>
        // Capture tab to switch between the Demo page views (input/textarea)
        (function(){
            var viewTogglers = $('menu.radio input');

            $(document).on('keydown', function(e){
                if( e.key == 'TAB' || e.keyCode == 9 ){
                    var $checked = viewTogglers.filter(':checked');
                    var $next = viewTogglers.eq(viewTogglers.index($checked) + 1);
                    if(!$next.length){
                        $next = viewTogglers.first();
                    }
                    $next.prop("checked", true).change();

                    return false;
                }
            });
        })();

        $('section :input').val('').fancyInput()[0].focus();

        // everything below is only for the DEMO
        function init(str){
            var input = $('section input').val('')[0],
                s = 'type something... ✌'.split('').reverse(),
                len = s.length-1,
                e = $.Event('keypress');

                input.nextElementSibling.className = '';

            var    initInterval = setinterval(function(){
                    if( s.length ){
                        var c = s.pop();
                        fancyInput.writer(c, input, len-s.length).setCaret(input);
                        input.value += c;
                        //e.charCode = c.charCodeAt(0);
                        //input.trigger(e);

                    }
                    else clearInterval(initInterval);
            },150);
        }

        init();

        $('menu').on('click', 'button', toggleEffect);
        $('menu.radio').on('change', 'input', changeFORM).find('input:first').prop('checked',true).trigger('change');

        // change effects
        function toggleEffect(num){
            var className = '';
                idx = $(this).index() + 1,
                $fancyInput = $('.fancyInput');

            if( idx > 1 )
                className = 'effect' + idx;

            $('#content').prop('class', className);
            $fancyInput.find(':input')[0].focus();

            $(this).addClass('active').siblings().removeClass('active');
        }

        function changeform(e){
            // radio buttons stuff
            var page = this.value,
                highlight = $(e.delegateTarget).find('> div'),
                label = $(this.parentNode),
                marginLeft = parseInt( label.css('margin-left') , 10 ),
                xPos;

            highlight.css({'left':label.position().left + marginLeft, 'width':label.width() });

            // page change stuff
            xPos = '-' + label.index() * 50;
            $('#content').css( 'transform', 'translateX(' + xPos + '%)' );

            setTimeout(function(){
                $('#content').find('.' + page  + ' :input')[0].focus();
            }, 100);
        }
    </script>
</body>
</html>
大家可以预览下效果,至于实现过程,看下案例对照学习下,这里就长篇阔论了,当然您可以加入我们前端群来讨论学习。
总结
上面我列举三个代表案例,目的就是让大家意识到,Text的一些交互体验也是非常重要的,虽然是一些很基础很细节的东西。有时候设计师给到的设计稿,并没有提到这里需要做交互效果,而你作为前端人员加入了自己的一些想法,会让设计师和管理对你刮目相看。每次在项目前要多去思考,项目后多去总结,这样你才会进步。多看、多学, 多总结!


网友评论文明上网理性发言 已有0人参与
发表评论: