threeJs应用:实现波纹扩散及光标浮动。那么怎么实现呢?首先我们需要用到:
一起往下看吧。
思路
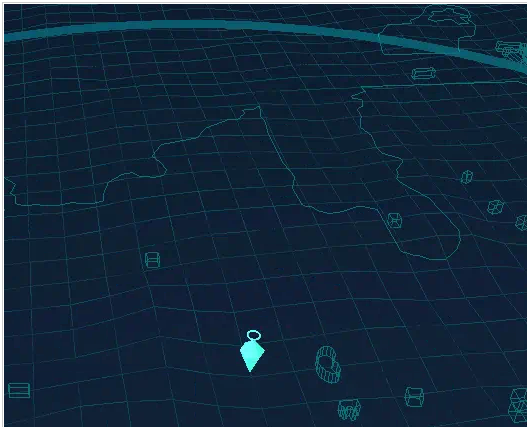
效果如下:
核心代码
// 扩散动画
this.group2.scale.x = this.group2.scale.x + 0.1
this.group2.scale.y = this.group2.scale.y - 0.01
this.group2.scale.z = this.group2.scale.z + 0.1
if(this.group2.scale.x > 10){
  this.group2.scale.x = 1
  this.group2.scale.y = 1
  this.group2.scale.z = 1
}
导入即用
1. 新建一个ts文件
import * as THREE from "three";
import { OBJloader } from "three/examples/JSM/loaders/OBJLoader.JS";
import { MTLLoader } from "three/examples/jsm/loaders/MTLLoader.js";
import { OrbitControls } from "three/examples/jsm/controls/OrbitControls.js";
import { GLTFLoader } from "three/examples/jsm/loaders/GLTFLoader.js";
import { DRACOLoader } from "three/examples/jsm/loaders/DRACOLoader.js";
Export default class ThreeD {
  PRivate cylinderRadius: any; // 圆柱体半径
  private cylinderOpacity: any; // 圆柱体透明度
  private cylinderMesh: any; // 圆柱网格
  private scene: any; // 场景
  private camera: any; // 相机
  private renderer: any; // 渲染器
  private group: any; // 新的组对象,控制模型
  private group2: any; // 圆柱体模组
  private group3: any; // 圆柱体模组-普通点
  private group4: any; // 点位模型
  private controls: any; // 创建控件对象
  private path: any; // 路径
  private objName: any; // 模型
  private mtlName: any; // 材质
  private cameraX: Number; // 相机x
  private cameraY: Number; // 相机y
  private cameraZ: Number; // 相机z
  private objSize: Number; // 模型倍数
  private modelspeed: Number; // 旋转速度
  private screenwidth: Number; // 旋转速度
  private screenheight: Number; // 旋转速度
  constructor(
    cameraX: Number,
    cameraY: Number,
    cameraZ: Number,
    objSize: Number,
    modelSpeed: number
  ) {
    // this.path = path;
    // this.objName = objName;
    // this.mtlName = mtlName || null;
    this.cameraX = cameraX;
    this.cameraY = cameraY;
    this.cameraZ = cameraZ;
    this.objSize = objSize;
    this.screenWidth = 0
    this.screenHeight = 0
  }
  /**
   * 初始化
   * @param instance 容器DOM
   */
  initThree(instance: htmlElement | Null) {
    // 场景宽高
    const width: any = instance && instance.clientWidth;
    const height: any = instance && instance.clientHeight;
    this.screenWidth = width;
    this.screenHeight = height;
    // 1. 创建场景对象Scene
    this.scene = new THREE.Scene();
    // 2. 创建相机对象fov 代表视角\aspect 宽高比\near 最近看到\far 最远看到
    this.camera = new THREE.PerspectiveCamera(50, width / height, 0.1, 200000);
    // 设置相机位置(眼睛位置或者说相机篇拍照位置x,y,z)
    this.camera.position.set(600, 300, 100);
    // 设置相机视角的角度
    this.camera.lookAt(0, 0, 0);
    // 3.创建组和模型
    this.group2 = new THREE.Group() // 组-总光圈
    this.group4 = new THREE.Group() // 组-光标
    // 创建光圈-总的
    this.loadGlbCylinder('Cylinder2.glb', '0', true,10,0,0,0);
    // 标注点
    this.loadGlbPoint('biaozhi.glb', '0', true,20);
    // 把group对象添加到场景中
    this.scene.add(this.group);
    this.scene.add(this.group2);
    this.scene.add(this.group3);
    this.scene.add(this.group4);
    // 4. 创建光源
    this.createPoint();
    // 5. 创建渲染器对象
    this.renderer = new THREE.WEBGLRenderer();
    // 设置渲染器的大小
    this.renderer.setSize(Number(width), Number(height));
    // 增加背景颜色
    this.renderer.setClearcolor(0xeeeeee, 0);
    // 将渲染器添加到div中
    instance && instance.append(this.renderer.domElement);
    // 7. 动画旋转
    this.Animate();
  }
  // 创建glb模型-圆柱体
  /**
   *
   * @param obj 文件名字
   * @param name 模型名字
   * @param showFlag 是否展示
   * @param scale 放大倍数
   * @param x
   * @param y
   * @param z
   */
  loadGlbCylinder(obj:string,
                  name:String,
                  showFlag:any,
                  scale:number,
                  x:number,
                  y:number,
                  z:number) {
    const dracoLoader = new DRACOLoader();
    dracoLoader.setDecoderPath("three/js/libs/draco/gltf/");
    const loader = new GLTFLoader();
    loader.setDRACOLoader(dracoLoader);
    loader.load(
      `model/${obj}`,
      (gltf) => {
        const model = gltf.scene;
        model.position.set(x, y, z); // 模型坐标偏移量xyz
        model.scale.set(scale, scale, scale);
        model.name = name;
        model.visible = showFlag;
        model.traverse((Object:any) => {
          if (object.isMesh) { // 开启透明度
            object.material.transparent = true;//开启透明
            object.material.opacity = 0.3;//设置透明度
          }
        })
        this.group2.add(model);
      },
      undefined,
      function (e) {
        console.error(e);
      }
    );
  }
  /**
   *  创建glb模型-圆柱体-普通
   * @param obj 文件名字
   * @param name 模型名字
   * @param showFlag 是否展示
   * @param scale 放大倍数
   * @param x
   * @param y
   * @param z
   */
  loadGlbPoint(obj:string,
               name:string,
               showFlag:any,
               scale:number) {
    const dracoLoader = new DRACOLoader();
    dracoLoader.setDecoderPath("three/js/libs/draco/gltf/");
    const loader = new GLTFLoader();
    loader.setDRACOLoader(dracoLoader);
    loader.load(
      `model/${obj}`,
      (gltf) => {
        const model = gltf.scene;
        model.position.set(0, 0, 0); // 模型坐标偏移量xyz
        model.scale.set(scale, scale, scale);
        model.name = name;
        model.visible = showFlag;
        model.traverse((object:any) => {
          if (object.isMesh) { // 开启透明度
            object.material.transparent = true;//开启透明
            object.material.opacity = 1;//设置透明度
          }
        })
        this.group4.add(model);
      },
      undefined,
      function (e) {
        console.error(e);
      }
    );
  }
  // 创建光源
  createPoint() {
    //环境光
    const ambIEntLight = new THREE.AmbientLight(0xffffff, 1);
    // ambientLight.position.set(400, 200, 300);
    this.scene.add(ambientLight);
  }
  // 动画效果
  animate() {
    const clock = new THREE.Clock();
    // 渲染
    const renderevent = () => {
      // const spt = clock.getDelta() * 1000; // 毫秒
      // console.log("一帧的时间:毫秒", spt);
      // console.log("帧率FPS", 1000 / spt);
      //循环调用函数,请求再次执行渲染函数render,渲染下一帧
      requestAnimationFrame(renderEvent);
      // 将场景和摄像机传入到渲染器中
      this.renderer.render(this.scene, this.camera);
      // 围绕物体y轴自转
      // this.group.rotation.y -= 0.002;
      // 圆柱体扩散动画
      this.group2.scale.x = this.group2.scale.x + 0.5
      this.group2.scale.y = this.group2.scale.y - 0.01
      this.group2.scale.z = this.group2.scale.z + 0.5
      if(this.group2.scale.x > 50){
        this.group2.scale.x = 1
        this.group2.scale.y = 1
        this.group2.scale.z = 1
      }
      // 上下移动
      const time = date.now() * 0.005
      this.group4.position.y = Math.cos( time ) * 1.75 + 2.25
    };
    renderEvent();
  }
}
2. 在要用的页面导入
在页面建立dom
<div class="zong-model" ref="dom"></div>
导入js
import ThreeD from "@/utils/threeD_fixed";
在onMounted中使用
threeObj = new ThreeD(8, 50, 60, 1, 2);
dom.value && threeObj.initThree(dom.value);
大家试试吧。


网友评论文明上网理性发言 已有0人参与
发表评论: