本文实例讲述了JQuery+html5美女瀑布流布局实现方法。分享给大家供大家参考。具体如下:
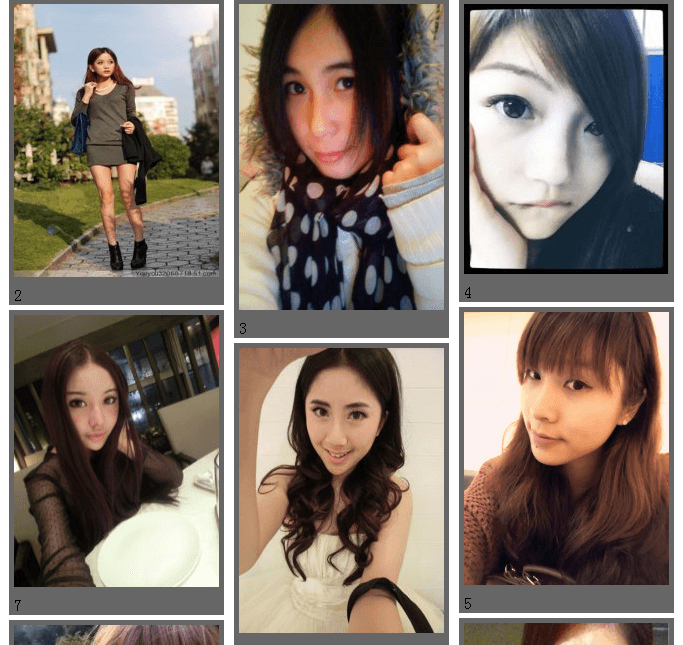
这是一款javascript与HTML5实现美女瀑布流布局,本方法是把图片的路径写在了JS的数组里,不过重点好像不是在这里,而是在图片如何自动排列的问题,你可以运行本实例后,点击“加载瀑布流布局”按钮,即可看到图片的瀑布流排列效果,现在很流行这个,希望您从本代码中能找到一些灵感。
运行效果截图如下:
在线演示地址如下:
http://demo.jb51.net/js/2015/js-html5-mn-pb-style-codes/
具体代码如下:
<!DOCtype html>
<HTML>
<head>
<title>美女瀑布流</title>
<style type="text/CSS">
*{margin:0;padding:0}
div.section{overflow:hidden}
div.aside{width:225px;float:left;display:inline}
div.aside div.content{margin:5px;background:#666}
div.aside div.content img{width:205px;margin:5px;}
div.aside div.content div.imgcaption{margin:0 5px;line-height:20px}
</style>
</head>
<body>
<div class="section">
 <div class="aside"></div>
 <div class="aside"></div>
 <div class="aside"></div>
 <div class="aside"></div>
</div>
<button>加载瀑布流布局</button>
</body>
<script type="text/JavaScript" src="jQuery-1.6.2.min.js"></script>
<script type="text/Javascript">
var json=[
 {"text":"1","src":"images/1.jpg","height":"273"},
 {"text":"2","src":"images/2.jpg","height":"273"},
 {"text":"3","src":"images/3.jpg","height":"306"},
 {"text":"4","src":"images/4.jpg","height":"270"},
 {"text":"5","src":"images/5.jpg","height":"273"},
 {"text":"6","src":"images/6.jpg","height":"307"},
 {"text":"7","src":"images/7.jpg","height":"272"},
 {"text":"8","src":"images/8.jpg","height":"285"},
 {"text":"9","src":"images/9.jpg","height":"303"},
 {"text":"10","src":"images/10.jpg","height":"272"},
 {"text":"11","src":"images/5.jpg","height":"273"},
 {"text":"12","src":"images/7.jpg","height":"273"},
 {"text":"13","src":"images/3.jpg","height":"280"}
]
function getsmallDiv(wrap,oD){
 var len=oD.length;
 var h=Infinity;
 var getD;
 for(var i=0;i<len;i++){
  if(oD.eq(i).height()<h){
   h=oD.eq(i).height();
   getD=oD.eq(i);
  }
 }
 return getD;
}
$("button").click(function(){
 for(var i=0;i<JSON.length;i++){
  var str;
  str="<div class=\"content\">";
  str+="<img src="+json[i].src+" height="+json[i].height+" alt=\"\" />";
  str+="<div class=\"imgcaption\">"+json[i].text+"</div>";
  str+="</div>";
  getSmallDiv($(".section"),$(".aside")).append(str);
 }
});
</script>
</html>


网友评论文明上网理性发言 已有0人参与
发表评论: